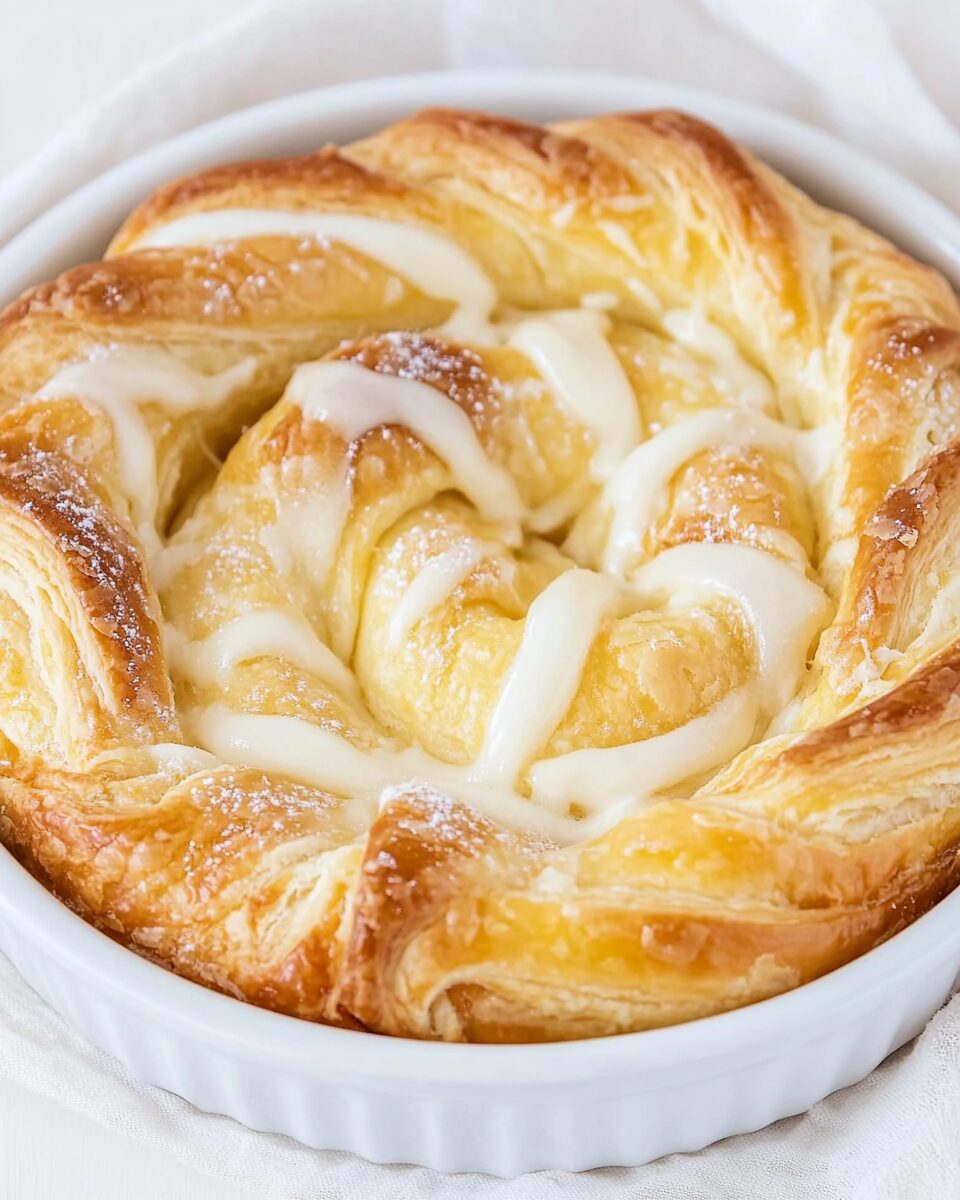
Cheese Danish
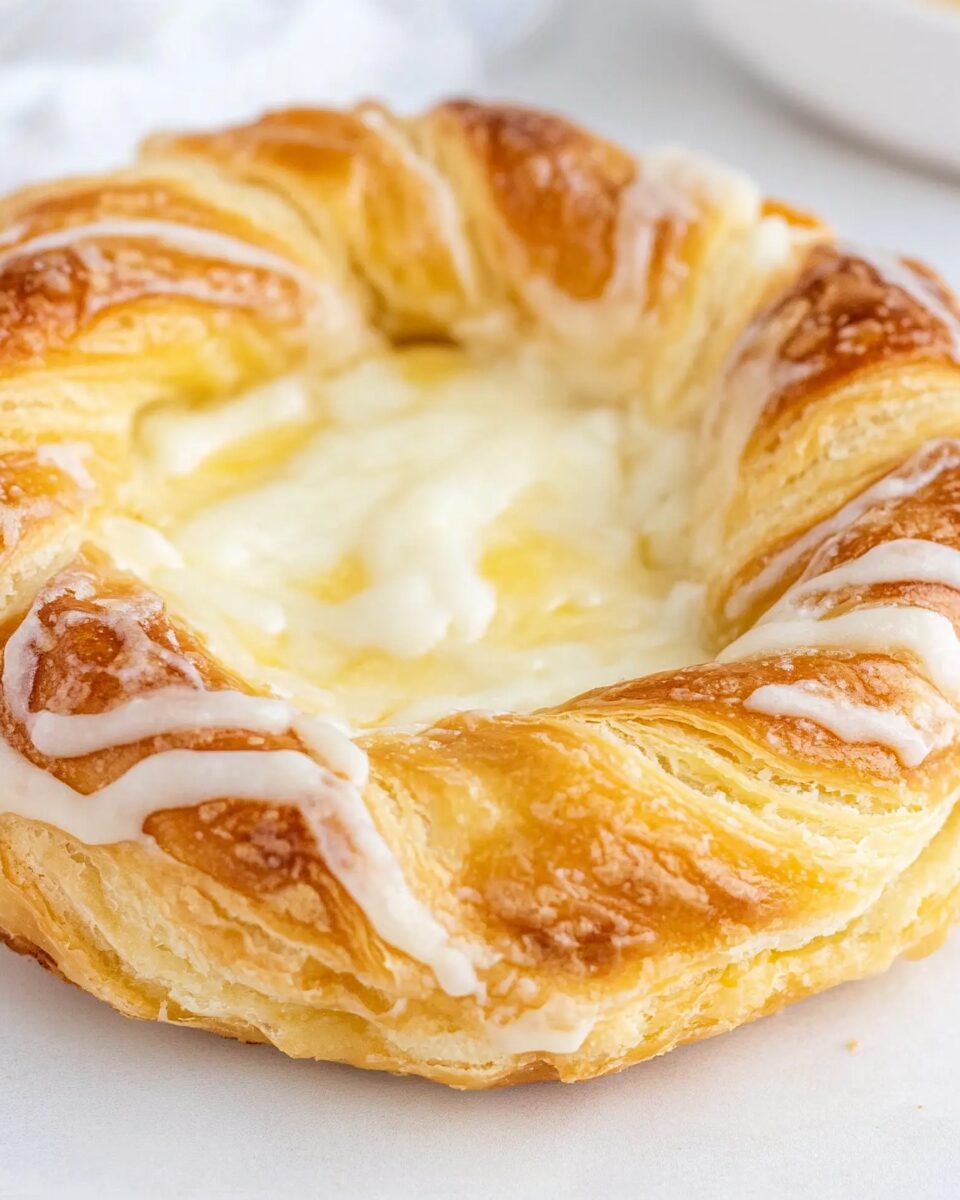
Cheese Danish is a classic pastry that seamlessly combines flaky, buttery dough with a rich, creamy cheese filling. This delightful treat is a staple in bakeries and cafes around the world, often enjoyed as a breakfast item or a sweet snack. The moment you take a bite, the layers of the pastry melt in your mouth, while the tangy cheese filling adds a satisfying contrast. Its golden-brown exterior, often dusted with powdered sugar or drizzled with icing, makes it not only a treat for the palate but also a feast for the eyes. Imagine serving these warm, freshly baked Cheese Danishes at a brunch gathering, and watch as guests indulge in their delightful flavors. Whether you’re an experienced baker or just starting out, this recipe will guide you through creating the perfect Cheese Danish that will impress your family and friends. The combination of textures and flavors in this pastry is simply irresistible, making it a must-try recipe for any pastry enthusiast.
Why You’ll Love This Recipe?
This Cheese Danish recipe is a fantastic choice for several reasons that will have you returning to it time and again. First and foremost, the taste is simply unparalleled. The buttery, flaky layers of the pastry are perfectly complemented by the sweet and tangy cheese filling, which often includes cream cheese, sugar, and a hint of vanilla. This harmonious blend makes every bite a delightful experience. Secondly, the preparation of this recipe is surprisingly straightforward. With clear step-by-step instructions, even novice bakers can create bakery-quality Danishes from the comfort of their own kitchens. The recipe requires only a few key ingredients, making it accessible and convenient. Lastly, the visual appeal of Cheese Danishes is undeniable. Their golden hue and elegant shape make them perfect for special occasions, holiday gatherings, or even just as a treat for yourself. When you present a platter of these pastries, they are sure to steal the spotlight and leave everyone eager for more.
Ingredients:

To create your own Cheese Danish, you will need the following ingredients, each playing a crucial role in the overall flavor and texture of the pastry:
- 2 cups all-purpose flour: This will form the base of your pastry. Opt for a high-quality flour that provides a good balance of protein for structure.
- 1 cup unsalted butter, cold and cubed: The key to flaky pastry is cold butter. This ingredient provides richness and flavor while helping to create the desired layers.
- 1/4 teaspoon salt: A small amount of salt enhances the flavor of the pastry, bringing out the sweetness of the cheese filling.
- 1/4 cup granulated sugar: This adds sweetness to the pastry and balances the flavors of the filling.
- 1/4 cup cold water: Cold water helps to keep the butter firm while mixing the dough, ensuring a flaky texture.
- 8 ounces cream cheese, softened: The star of the filling, cream cheese offers a rich and creamy texture that pairs perfectly with the pastry.
- 1/2 cup powdered sugar: This adds sweetness to the cheese filling while also helping to create a smooth consistency.
- 1 teaspoon vanilla extract: A touch of vanilla enhances the flavor profile of the cheese filling.
- 1 egg (for egg wash): An egg wash gives the Danish a beautiful golden color when baked.
- Powdered sugar for dusting: This optional ingredient adds a touch of sweetness and visual appeal when serving.
With these ingredients, you will be well on your way to creating a batch of Cheese Danishes that are sure to impress. The combination of the flaky pastry and creamy filling makes this recipe a classic that never goes out of style.
How To Make Cheese Danish?
Follow these detailed steps to create your own Cheese Danish from scratch:
- Start by preparing the dough. In a large mixing bowl, combine the all-purpose flour, granulated sugar, and salt. Mix until well combined.
- Add the cold, cubed unsalted butter to the flour mixture. Use a pastry cutter or your fingertips to work the butter into the flour until the mixture resembles coarse crumbs. The pieces of butter should be about the size of peas, which will help create the flaky layers.
- Gradually add the cold water, one tablespoon at a time, mixing gently with a fork until the dough begins to come together. Be careful not to overwork the dough.
- Once the dough is formed, shape it into a disc, wrap it in plastic wrap, and refrigerate for at least 30 minutes. This chilling time is essential for achieving a flaky pastry.
- While the dough chills, prepare the cheese filling. In a mixing bowl, beat the softened cream cheese until smooth. Add the powdered sugar and vanilla extract, mixing until well combined. Set aside.
- After the dough has chilled, preheat your oven to 400°F (200°C). Line a baking sheet with parchment paper to prevent sticking.
- On a lightly floured surface, roll out the chilled dough into a rectangle, about 1/4-inch thick. Use a sharp knife or a pizza cutter to cut the dough into squares, approximately 4×4 inches in size.
- Place a generous tablespoon of the cheese filling in the center of each square. Be careful not to overfill, as this can cause the filling to spill out during baking.
- To shape the Danishes, fold the corners of each square towards the center, pinching the edges to seal the filling inside. Alternatively, you can leave them open for a more rustic look.
- Transfer the shaped Danishes to the prepared baking sheet, leaving space between each pastry. Beat the egg in a small bowl and brush it over the tops of the Danishes for a beautiful golden color when baked.
- Bake in the preheated oven for 15-20 minutes, or until the pastries are golden brown and flaky. Keep an eye on them to prevent over-browning.
- Once baked, remove the Cheese Danishes from the oven and let them cool slightly on the baking sheet. If desired, dust with powdered sugar before serving.
Now you have a batch of warm, homemade Cheese Danishes ready to be enjoyed. The process may take some time, but the result is well worth the effort, providing a comforting treat that can be savored any time of day.
Tips For Variations:
While the classic Cheese Danish is a favorite, experimenting with variations can add exciting new flavors and textures. Here are some unique ideas to consider:
- Fruit-filled Cheese Danish: Add a layer of fresh fruit or fruit preserves alongside the cream cheese filling. Options like blueberries, raspberries, or sliced peaches work wonderfully and provide a burst of flavor.
- Cinnamon Sugar Twist: Incorporate cinnamon into the cheese filling for a warm, spiced flavor. Alternatively, sprinkle a mixture of cinnamon and sugar on top of the pastries before baking for a sweet crust.
- Nuts and Seeds: For added texture, mix chopped nuts such as almonds or walnuts into the cheese filling. This not only enhances the flavor but also adds a satisfying crunch.
- Chocolate Lovers: Swirl in some melted chocolate or mini chocolate chips into the cream cheese mixture. The combination of chocolate and cheese creates a decadent treat that’s hard to resist.
- Herb-Infused: For a savory twist, consider adding fresh herbs like chives or dill into the cheese filling. This creates a unique flavor profile that pairs beautifully with the flaky pastry.
Don’t hesitate to get creative with your Cheese Danish. The possibilities are endless, and each variation can be tailored to suit your taste preferences or seasonal ingredients. Experimenting with different fillings and toppings can turn a classic recipe into something uniquely your own.
Serving Suggestions:
Cheese Danishes are versatile pastries that can be served in various settings and occasions. Here are some creative serving suggestions to elevate your presentation:
- Brunch Buffet: Arrange a platter of Cheese Danishes alongside a selection of fresh fruits, yogurt, and coffee for a delightful brunch spread. The combination of flavors and colors will be visually appealing and satisfying for guests.
- Afternoon Tea: Serve warm Cheese Danishes with a selection of teas. Pair them with lemon curd or a fruit preserve on the side, allowing guests to add a touch of sweetness if desired.
- Picnic Treat: Pack Cheese Danishes in a picnic basket for an outdoor gathering. Their portability makes them an excellent choice for sharing with friends and family.
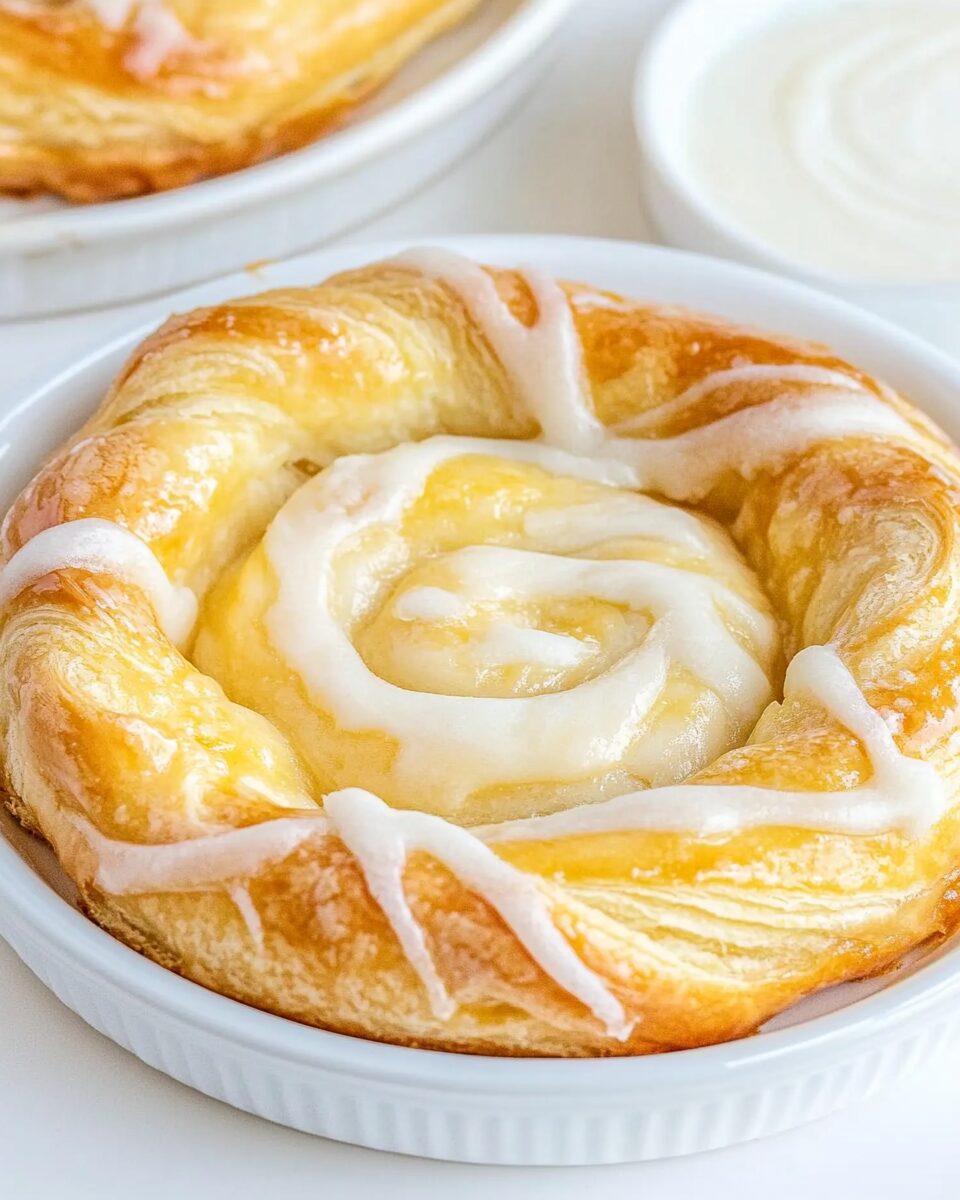
- Dessert Option: Drizzle the Danishes with a simple glaze made from powdered sugar and milk for a sweet finish, making them a perfect dessert after dinner.
- Breakfast On-the-Go: Wrap individual Cheese Danishes in parchment paper for an easy breakfast option that can be enjoyed on the way to work or school.
Regardless of how you choose to serve them, Cheese Danishes are sure to impress and satisfy. Their versatility makes them suitable for any occasion, whether it’s a casual family breakfast or a formal gathering.
FAQ:
Can I make Cheese Danishes ahead of time?
Yes, you can prepare the pastry dough and cheese filling in advance. Store the dough wrapped in plastic wrap in the refrigerator for up to two days. The cheese filling can also be made ahead and refrigerated. Assemble and bake when ready to serve.
How do I store leftover Cheese Danishes?
Store any leftover Cheese Danishes in an airtight container at room temperature for up to two days. For longer storage, you can refrigerate them for up to a week or freeze for up to a month. Reheat in the oven for best results.
Can I use store-bought pastry dough?
Absolutely! Using store-bought puff pastry can save time. Roll it out and cut it into squares, then fill with the cheese mixture and bake as directed. This shortcut still yields delicious results.
What can I serve with Cheese Danishes?
Cheese Danishes pair well with fresh fruits, coffee, or a light yogurt. Consider serving them with a fruit preserve or honey for a sweet touch, enhancing the overall experience.
How do I know when my Cheese Danishes are done baking?
Cheese Danishes are done when they are golden brown and flaky. You can also check the filling; it should be set but still creamy. A light golden color on top is a good indicator of doneness.

Cheese Danish
Equipment
- Mixing Bowl
- Baking Sheet
- Parchment Paper
- Rolling Pin
Ingredients
Pastry Dough
- 2 cups all-purpose flour Opt for high-quality flour for better structure.
- 1 cup unsalted butter, cold and cubed Cold butter is key for flaky pastry.
- 1/4 teaspoon salt Enhances the flavor of the pastry.
- 1/4 cup granulated sugar Adds sweetness to the pastry.
- 1/4 cup cold water Keeps the butter firm while mixing.
Cheese Filling
- 8 ounces cream cheese, softened Provides a rich and creamy texture.
- 1/2 cup powdered sugar Adds sweetness and smooth consistency.
- 1 teaspoon vanilla extract Enhances the flavor profile.
- 1 large egg (for egg wash) Gives the Danish a golden color.
Optional Topping
- powdered sugar for dusting Adds sweetness and visual appeal.
Instructions
- In a large mixing bowl, combine the all-purpose flour, granulated sugar, and salt. Mix until well combined.
- Add the cold, cubed unsalted butter to the flour mixture. Use a pastry cutter or your fingertips to work the butter into the flour until the mixture resembles coarse crumbs.
- Gradually add the cold water, one tablespoon at a time, mixing gently with a fork until the dough begins to come together.
- Shape the dough into a disc, wrap it in plastic wrap, and refrigerate for at least 30 minutes.
- In a mixing bowl, beat the softened cream cheese until smooth. Add the powdered sugar and vanilla extract, mixing until well combined.
- Preheat your oven to 400°F (200°C) and line a baking sheet with parchment paper.
- On a lightly floured surface, roll out the chilled dough into a rectangle, about 1/4-inch thick. Cut the dough into squares, approximately 4x4 inches in size.
- Place a generous tablespoon of the cheese filling in the center of each square.
- Fold the corners of each square towards the center, pinching the edges to seal the filling inside.
- Transfer the shaped Danishes to the prepared baking sheet, leaving space between each pastry. Brush the tops with beaten egg.
- Bake for 15-20 minutes, or until the pastries are golden brown and flaky.
- Let the Cheese Danishes cool slightly on the baking sheet. Dust with powdered sugar before serving if desired.